Learn how to bring your sketches alive with the Dell XPS empowered by NVIDIA! #NVIDIACreators …
Order the best illustration at the best price for your business, your company, or to resell them on other sites that pay for the service at more expensive prices, earning the difference:
✔️Click Here to Quick and economical illustration.
today i’m going to show you how i go from a sketch to a full vector drawing using adobe illustrator with just a touch of photoshop thrown in to add some special effects hello my name is brad usually i review tech for creative professionals today i’m doing something a little bit differently we are going to be doing an introduction to adobe illustrator in order to do that we’re going to be taking this sketch and we’re going to be turning it into this finished drawing now my goal here is to make this super simple if you know a little bit about adobe illustrator already as i go through some of these steps you might be saying hey couldn’t the pencil tool do that or couldn’t the shape tool do that or couldn’t we just do this another way and the answer to all those questions is most likely yes we’re going to be focusing a lot today on the pen tool because if you can master the pen tool you have mastered illustrator everything else just falls into place i started using adobe illustrator years ago because i didn’t have a drawing tablet and so the techniques that i use there i’m going to be talking about today so with that said let’s go over the three primary tools that we’re going to be using throughout this entire lesson the first tools are our arrow tools there are two of them the selection tool is the black arrow using this you can click on objects and move them around or resize them or even rotate them the second tool is our white arrow tool this is called the direct select tool you use this to select points or nodes within shapes like this corner once you grab that you can use the white arrow tool to move it around and just kind of mess with it pretty cool if a point has a curve to it like this circle you can also grab the handles with the direct select tool and modify it that way too and this brings us to our third tool the pen tool the pen tool lets you freehand your own shape every click lays down a point clicking on an open point closes the shape if you click and drag you make a curve this is what makes drawing with the pen tool possible and we’re gonna be click and dragging a lot this is also one of the harder things to get used to in adobe illustrator so the more practice you get the better sometimes your lines are gonna look a little wonky that’s when you take our little white arrow tool click on a point and adjust it a little bit make it look better so those are the basics before we jump into the big drawing project though i do want to shout out to today’s sponsor dell and nvidia studio question i get all the time in the comments when i do a video like this is what hardware are you using what laptop is that this is the dell xps and powered by nvidia studio now obviously it looks great i have the arctic white here it also comes in black but it’s what’s inside that really counts this is a really powerful computer and the start of the show is the gpu an nvidia geforce rtx 3050. you may remember some of the isometric city illustrations that i’ve worked on here on this channel from time to time as those files get bigger and some of those files get really detailed those files can be really hard to work with they start to lag as they get larger especially if you’re zooming in and out a lot panning around adding nodes turning layers on and off nvidia studio accelerates more than 70 of today’s most popular creative applications including adobe illustrator and that optimization really shows when you’re working on graphically intense creative projects this full color city has always brought my computers to their knees but i am zooming in and out with no problem check out the link in the description to learn more and thank you to dell in nvidia studio for sponsoring this video i think all good illustrations start with a sketch and that is where i am starting here it doesn’t matter how you create your sketch if you use paper or if you do it digitally but i have decided to use paper here and you can just grab your phone and snap a photo of it bring it over to your computer or here i’m just using the webcam on on my laptop in order to get it onto my computer now in photoshop i’m just going to come in here and use the lasso tool to get rid of my hand and uh quite a bit more i’m going to say select and inverse then i can just go ahead and hit backspace here to remove all that excess i don’t need and of course i could always come in here with the lasso tool and grab any of those parts that i missed the first time around so now that i have that cropped out i want to make the background as white as possible so in order to do that i’m going to go up here to image then i’m going to go down to adjustments and i’m going to go down here to curves now curves is kind of a fun way to play around with our contrast and brightness and whatnot and what we have are different peaks over here this is our whiteness so if i want to just grab this over here and pull it over that’s going to just pull all the white back into the drawing it’s basically going to brighten everything and on the bottom half of that scale i can pull it up to make some of my lines a little bit darker now as you can see underneath i am losing some of my lines so i do want to adjust that a little bit maybe i i don’t want to make it too bright so maybe i’ll pull it back a little maybe pull this back as well but i could always add an actual curve to play with the different parts of the drawing this is the part where you just fiddle with it and try to find something that works it’s not perfect but i think this is going to work really well for what we want to do so i’m going to go ahead and click ok now i can just take my selection tool highlight my character hit control c open up adobe illustrator what file size we use isn’t important so i’m just going to go with the basic letter size and then i’m going to hit control v to paste in my sketch and we’re on our way but what’s important to know is over here on the left side is where most of our tools are got our arrow tools our pen tools our brush tools our shape tools our gradient tools our eyedropper tools but we’re also going to be spending a lot of time on the right hand side of this document and by default illustrator is going to look like this you’ve got your properties you’ve got your layers and those are the two tabs right here that i’m going to be switching between quite a bit but for now i want to start by going to the layer and i’m going to lock the layer that my sketch is on and there is a little invisible spot next to the little eye and if you click it a lock icon is going to appear now down at the bottom of the page i’m going to go ahead and click this little plus icon that says create a new layer and all our lines that we’re going to be drawing in this first part are going to be on its own layer i use a lot of keyboard shortcuts in adobe illustrator and one of the key ones is control plus to zoom in and control minus to zoom out oftentimes when you gotta do detail work in illustrator it’s really good to zoom way in so you can get at some of those points and lines the other keyboard shortcut i rely on a lot is the spacebar that brings up your hand tool which lets you pan around your document so you’re gonna see me zooming in and out and panning around the document quite a bit it’s totally normal most people work that way in illustrator and those are some shortcuts to get used to early alright so let’s just start drawing i’m going to start with my character’s ear here by drawing a line so i’m going to click my first point gonna click my second point going to click my third point and drag because there’s a little bit of a curve there i wanna get that and then i’m gonna come down here i’m gonna click and drag again click and drag again and then over here now when i’m done drawing those lines you’re still going to be attached to this so wherever you click it’s going to create another point i don’t want that so when i’m done with that line i’m going to hit escape i’m going to be hitting escape a lot so i’m going to click some points draw a line hit escape click some points to draw another line hit escape there’s a couple things that are happening right away by default in illustrator first of all let’s zoom way in on this guy’s ear over here in our properties uh i have my fill on is white and so it’s drawn a white box it could be hard to see i’ll i’ll change it to red so you can see what’s going on but i want nothing as a fill so i’m going to turn the fill off underneath the fill i have the stroke i am going to turn that on and i’m just going to make that black by default it’s one point i think for now let’s make it two to make it stand out a little bit more another thing i’m going to do at this point is i’m going to turn off snapping snapping is what happens when points try to snap to lines or guess where your point is going it’s fantastic for layouts i don’t like it nearly as much for illustrations so i’m going to go to view and i’m going to turn off smart guides i’m going to go to view again and i’m going to turn off snap to glyph view again snap to point part of what happened on his ear is it was snapping and as it did that it made this thing appear in a weird spot which means i have to come in here and i have to readjust it to make his ear look the way i wanted it to look in the first place but once i get that adjusted and everything is looking great i’m in good shape so i’m going to add a couple more lines click click that line is done i hit escape i’m going to pan up a little bit so i can see something a little bit better take the pen at the start of my line this is a little bit of an arc so i’m going to click and drag then i’m going to click to this point and click here and then this is a little bit of an arc again so what do i do i click and drag in the middle of it click to the end this is also an arc so i click and drag and then when i want to close that shape i make sure that my pen has that little circle next to it i click i’m good and that’s pretty much what i’m going to do for the rest of the illustration but there’s a few things that i want to show you that might save you some time while we’re working on this let me zoom out a little bit and i want to talk about his hat because there are some shortcuts we can take for example on the left hand side i have my shape tools i grab my ellipse tool here and that’s going to draw us a nice circle shape and if i grab the edges i can increase or decrease the size of that circle on the corners you’ll see my little icon will turn into this rotate tool which will let me rotate it a little bit then using my black arrow i can move up here and i can just resize it and try to fit his hat to the best i can i’m going to have to stretch a little bit here i’m going to have to rotate a little bit here but i am going to get it to a point where it looks pretty good but as you may have noticed there is a problem i don’t want the line to go all the way across his face you don’t see that part of the line so let’s go ahead and zoom in really close and i’m going to pan over and i’m going to use the pen tool and if you click on a line using the pen tool what does it do it’s going to add another point for you then i’m going to scroll over here to this other ear where this line is going to end again i’m going to click that again to add another line and what i’m going to do is i’m going to delete what’s in between now there’s already a point here so i’m going to take my white arrow which lets me select my point see i selected my point so i could move it but once it’s selected i can also hit backspace or delete and it just removes it for me and there we go we’ve got our hat now as you probably noticed in your sketch there are two lines there so if i hold the alt key and drag on that shape i can actually duplicate it and just place it where i want it to go and then like i did before using the white arrow i can grab the points i don’t want and just grab that other point delete them as i go and then when i want to i could zoom way in like i was talking about i zoom a lot here and i can add a little bit of an extra line to complete things so using the pen tool if you hover over the end of a line you can click on it and then i could drag it to where i want to go probably right about there i’m done with that i’ll hit escape zoom out and i’m gonna pan over and then zoom back in whoops it’s focused on that icon that’s all right and i’m gonna do the same thing on this side click and click hit escape and there we go so i’m gonna go through this and there are going to be points where i’m going to have to delete things for example his finger right here i’m going to have to go in and delete a lot of things just for funsies let’s go in here and let’s uh let’s draw his fingernecks so you could see how i’m going to do this there is one other thing that might affect you while you’re drawing this stuff so let’s zoom in to this point if i select this line and then i grab the pen tool and i go to add a point if that point is covered by another line it’s not going to work it’s not going to add a point there intersect the wrong line or you’re going to start drawing a shape so you can move a little to the right to make sure that you add your point or the other thing you can do is you can go to your layers palette and over here there’s a little arrow next to your layer name and if you unfold it you’ll see every single path you’ve drawn so if i want i can move my finger down in my path order and then when i go with my tool here and i click on it there we go i have put it in the right place then i can add a point there hit backspace and i remove it i’m going to grab this line and do the same thing really quick since my path is below that and there we go now as this illustration goes on and we have hundreds of paths you are going to run into the problem of trying to figure out what’s on top and what’s on bottom so organizing these things in layers is really going to help you so i’m going to go through the rest of this and i’m going to get the main pieces but i’m not going to draw in the details yet just the major outlines and i’ll see you in a minute [Music] all right so what i have here are my major lines now what i want to do next is i want to add in some of the detail lines and to keep things kind of clean and allow us to experiment a little bit down the road with lines we’re going to put these on their own layer so in the lower right hand corner of our layers palette i’m going to click that plus button we’re going to create a new layer and just to make things easier might as well lock the old layer so we know we’re not accidentally drawing on it now we’re going to do the same exact thing we did last time and we’re just going to start drawing in some of these other lines and you can see our line color has changed you can assign layers a color so it’s easier to tell what layer you’re on which is really handy before i get too far into this though we’re going to go back over to our properties tab on the right now this time where it says stroke where i had it at two points i’m going to change that to one point by varying the the the width of these strokes it’s going to give our drawing some variation and it’s going to give it some detail that otherwise it wouldn’t have but here i’m just going to continue on on its own layer to draw in these thinner lines and add in some of these details so see in a minute okay so all those details are in place why did i separate these out into layers this is easier to show now that we have this all set up so i’ve locked my green layer and i’m going to come over here and i’m just going to drag over everything in my red layer and then i’m going to go back to properties and then on my stroke size i can change the size if i want to double the width of those strokes i can go in there and do that it doesn’t look good but what this allows me to do is it allows me by separating those layers to go in here and experiment a little maybe it looks good with like a three point and i can keep going and playing with that i can also play with those inside details a little bit differently if i want to make them thinner in some parts or if you want to color them that’s something that’s very easy to do in illustrator and something that you know is one of the great benefits of vector art in general but you’ve probably already noticed that i’ve got something else set up here i’m gonna go back to layers what i did is i created a new layer layer four and i did that by clicking on the plus button at the bottom of my layers if i just double tap on the name of the layer i can rename it and this is going to be my colors layer and you guessed it this is where we’re going to put our colors so i’ve locked all of the other layers so i don’t accidentally draw on them how am i going to do colors pretty much the same way that i’ve done everything else i’m going to come in here with my arrow tool or with my pen tool i mean and i’m going to come in and i’m going to just follow the outlines of my character now one thing i should point out is that my color layers are underneath my line layers and that’s on purpose there is a faster way to color in illustrator but it’s a little more complicated i actually have a video on it it’s several years old so you can see baby brad teaching illustrator if you want to check that one out i’ll link it in the description but now that i have drawn that shape underneath the character i’m going to go back to properties now my fill is still empty if i click on that i can fill it with a color and then also my stroke is still black i’m going to turn the stroke off because i want the fill but not the stroke this is often referred to in illustration as flatting in the colors and to kind of show you we’ll zoom out a little bit the reason i’ve already created a color palette over here is just to make my life a little bit easier i’m gonna be using a lot of muted colors because in the last step or bonus step we’re gonna be pulling this over photoshop and really pumping up the contrast and some of those colors but if i start with really saturated colors it’s hard to add those saturated colors on top of it so i can hit i can select that shape hit the letter i or grab the eyedropper tool and then select what color i want to fill that with and then i’m just going to repeat that for the rest of this character now also on my site i have these files and broken down into steps so if you want to go and grab my original illustrator files and work directly from those or just grab the color palette that i’m working from you can absolutely do that but as you see because this is on a layer below my lines my colors are being blocked in really nicely here and i’m just gonna keep going and going and i will see you guys in a minute [Music] all right so i’ve blocked in all my colors i also added an extra layer to throw a background color behind him because we’re gonna need that eventually so that’s good to have so now that those flats are in place it’s time to add the shadows i’m going to lock my color layer and my other layer and i’m going to go down here and hit plus and i’m going to create a new layer layer 6 which i’m going to name shadows above the colors now when i’m creating shadows i want to think about what my light source is here i made it pretty clear i put his little glowing magic finger in there that’s gonna be my primary light source what that means are my shadows are gonna fall on the other side of that character more along the left hand side of that character so if that light is on his finger maybe the bottom of his arm has a little bit of a shadow on it so to make shadows on this new layer i’m going to use the pen tool again our friend the pen tool and i’m just going to come in here and i’m just going to kind of guestimate where the shadow’s going to go and i will draw it in just like that just clicking everything in place click and drag click and drag the illustrator away right and let me get this shape in here maybe i don’t get his eyebrow because that’s sticking up a little bit artistic license there all right so i have another shape in there i’m going to go to properties and i’m going to actually change this shape to black and for the rest of this lesson i’m going to be using black a lot for my shadows now when we’re done with it we’re going to gonna do some things but right now we’re just going to block it in and it’s just going to be black and we’re going to roll with it so with that said i’m going to speed through these shadows okay we’ve got all our shadows blocked in and if we look at it what we should have are all our shapes on one layer so when i drag over i can select everything now something you may have seen me do is i just grabbed i just made random shapes to make my shadow and if i go in here and i change the opacity which is what we’re gonna do next i’m gonna go to properties and just scrub the opacity down things get a little weird where those shapes overlap it looks odd you know you get some of these extra shadows and things like going on we don’t want that so i’m gonna i’m gonna undo the opacity and we’re gonna use a tool called pathfinder we’re gonna find that here on the property so with all those shapes highlighted we can unite them all into one shape by clicking this button here which says unite so i unite those and look at that we’ve got one shape i’m going to highlight it i’m going to change the opacity maybe to like 75 and here you can kind of see through it and it’s all one shape so that’s that is what we’re going for uh so there’s other things we want to do as well for example right now the shadows look okay one of the problems you have when you use the color black as your main shadow color is that it desaturates some of the colors underneath it so if you have really vibrant colors which we don’t really have here yet that black can kind of desaturate it it could suck the energy out of it we don’t want that so we’re going to use something called a blend mode it’s kind of complicated i’m not going to get too deep into it but if we go here to where we see the link for opacity and we click on that it’s going to bring up some options and here our blend mode is normal i’m going to click on that i got a whole bunch of options the one that i want is called overlay i’m going to click on that and what that’s going to do is it’s going to let it’s it’s not going to kind of pull down the colors as much when we add that shadow so now i can i’m going to crank this opacity up a little bit and you can see it better now where it’s not quite as dark some of the punchiness of the colors coming through a little bit better especially on that skin tone especially on some of those blues that’s gonna help us out so my next step is to add some highlights in here uh this is gonna be fun so in order to do this we’re going to repeat what we did with the shadows this is going to be a new layer i’m going to go ahead and lock my shadows layer and i’m going to use the pen tool and unlike shadows we’re actually going to use a white color the first one i draw is going to be black but that’s okay because we go back to our properties we’ll click on fill and we’ll change it to white and now what i’m going to do is i’m going to go through and i’m just going to add some places where i think there would be some nice light highlights throughout this illustration okay now we’re going to do exactly what we did last time which is i’m going to just drag over everything select it i can pathfind it again if i want it doesn’t really matter so much that is going to group everything together which will be nice and then i’m gonna go to my opacity i’m going to change this to overlay and then i’m going to change the opacity down to i don’t know around 50 and so now we have some subtle highlights on his hair on his beard on his hat so with that if we wanted to we could say okay our our little character is done you know we could crop him and we could we could just roll with it from here but we’re gonna add some extra spice and in order to do that i’m going to import this character into photoshop and show you what i do from there so in photoshop i’m just going to start a nice 2000 pixel by uh 2000 pixel image you know something that will look good on instagram or social media and then i’m going to go back over to adobe illustrator and i’m going to go to my layers and i’m just going to unlock everything everything except the sketch layer and actually i don’t i don’t really need the background either so i’ll just highlight this character i’m not going to worry about the swatches either and once everything is highlighted i’m going to hit ctrl c or command c if you’re on a mac go back to photoshop and then ctrl v now what’s cool about photoshop is that there are smart objects because this is a vector drawing you can scale it up and make it huge and you’re not going to lose any resolution so you could lump it as a smart object which i think i’m going to do now and so if i want to change the size of it later i can it’s not going to be a problem it’s going to retain the vector properties in photoshop there’s also an option to add it to my current library that’s a whole nother thing that is in the adobe suite we’re not going to worry about that now so that’s unchecked i’m going to click ok and it’s going to paste my character in here now immediately my character is too small but that’s no problem it’s a vector object i can scale it up all i want so i’m just going to go ahead and scale to my heart’s content just so he fits the frame and then when it’s set and it looks pretty much the way i want it i hit enter and uh there we go now like illustrator i’m gonna work in layers so i’m gonna create a layer underneath this character and then i’m gonna you know sample a color blue using the eyedropper tool maybe grab something a little bit darker just like i did before and i’m going to fill that now i said before the reason i was using desaturated colors is because i want to add some of the more brighter more intense colors in this step so what i’m going to do is above my character i’m going to create a new layer i’m going to go to a color picker over here on the right and i’m going to go over to yellow and i’m going to just grab a nice intense color yellow something like that something really bright and then i’m going to go to my brush tool over here and i’m just going to spray it on using my mouse i’m just kidding i’m not going to spray it on what i want to you do is use an airbrush to kind of gently spray it on so i’m going to go up to window and i’m going to go down to brushes and this is going to open my brushes now when you first open it up it’s probably going to look like this i’m just going to use a general brush what i have here is a soft round brush this is like an airbrush and then if i would like in the upper left hand corner i can come up here and i can change the size i want to make it huge i don’t know how huge actually let’s make it like 800 that sounds like a good size and now when i spray it in i can make him all yellow i don’t want to do that yet i just want that yellow to appear where the character is i don’t want it to appear on the background how do i do that i want to create a selection out of the character in order to do that i go to the layer the vector smart object layer which i can rename carrickter to make life easier and if i highlight over the thumbnail hold down control and click it it selects that object you’re gonna see these marching ants around it that is gonna make my life easier so now when i click back to my layer one i can use my airbrush to just fill in the character handy stuff but before i do that i do wanna change the opacity of this airbrush down to around 25 and that way when i fill in i’m adding a little bit of yellow and what i want to do is i want to add that yellow where that magical glow is so maybe there’s a little bit on his face and i’m just gonna you know kind of click around every time i click i’m adding a little bit more yellow to the character a little bit more is going on so if you just want to add just a tiny bit of glow down here you can easily do that because your opacity isn’t up super high cool now i can use this little rectangular marquee tool on the left hand side and if i click anywhere it’s just going to deselect my character and then on layer one i can adjust it again and you bet i’m doing overlay i’m i’m doing an overlay and now we’ve added in some of that yellow glow i’m going to do it again with white because i want to kind of create a gradient effect you can see that i’m already kind of getting that but i’m going to click on that i’m going to go above character and i’m going to create two layers the top layer is going to be more high lights that we’re going to do with an airbrush and the layer underneath it is going to be more shadow i think layering this stuff really really can help we’ll do shadow first since that’s what i’m on so i’m going to go down here to black i’m going to go to my brush tool which is still on airbrush my character selected just going to kind of come around the edges i’m going to add even more shadow to this guy kind of like kind of like that and of course once i come in here and set it to overlay there we go we get we get more of that intensity then i’m gonna go to the highlight layer and this time instead of using black i’m going to go ahead and use some white i’m going to grab my airbrush again and i’m just going to come in here and it’s not set to overlay yet but i want to add more white there come in here set that to overlay and there we go so we’re starting to see this come together this is where i like to fiddle i’m always coming in here to the opacity of any given layer and i’m going to change it like that shadow is too much you know uh maybe i’m like okay you know what that that highlight is too much i’m going to turn the highlight down or maybe that yellow really looked good so if i want to add more yellow i could always create another layer with more yellow on it but in general this is the process i take to create my artwork also oftentimes i’ll create a layer underneath you know and do the same thing again with my white paint on a new layer underneath the character just like this just to say okay there’s gonna be some ambient light in the background around his finger as well and you guessed it that layer also set to overlay so that is pretty much my process that is how i like to go about creating cartoons using vector art bringing it into photoshop playing around with the settings and doing some things if you take a shot of this i would love to see it make sure you tag me on instagram or twitter or wherever you uh choose to post and again if you want to use my sketches those are available on my website you can download those so what do you think let me know down below in the description thank you all for watching and i’ll talk to you in a couple of days [Music] you
Order the best illustration at the best price for your business, your company, or to resell them on other sites that pay for the service at more expensive prices, earning the difference:
Quick and economical illustration – Click Here.

Entrada siguiente
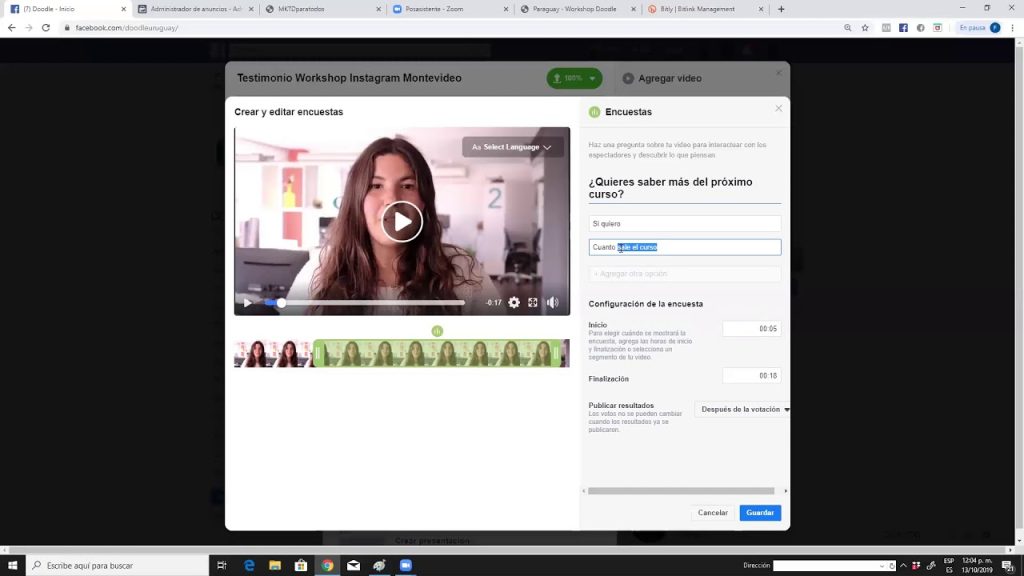
Tutorial Video interactivo en Facebook
Mié Sep 18 , 2024
Aprende a crear videos con botones en tu Fan Page y luego convertirlos en anuncios por interacción. Visita nuestra Web para … ¿Quieres cautivar a tu audiencia? Déjame elaborar tu próximo artículo o post. ✔️Pide tus posts al mejor precio aquí. O quieres despegar tus redes sociales: ✔️Pide tus publicaciones […]