Subscribe to the Adobe Creative Cloud through my affiliate link and help support the channel: …
Order the best illustration at the best price for your business, your company, or to resell them on other sites that pay for the service at more expensive prices, earning the difference:
✔️Click Here to Quick and economical illustration.
So you want to learn Adobe Illustrator but everything looks a little too complicated at start? Cool, this video is for you: everything you need to know to get started in just 10 minutes. First and foremost: what is Adobe Illustrator? Illustrator is a vector drawing software, which despite the name, is primarily used for graphic design. “What is a vector?” I hear you asking. Well, in design, vector is an image that can be scaled to infinity without losing quality. It’s the opposite of a bitmap image, like a photo, which is made out of pixels and has a set resolution. But don’t worry, you can still use bitmap images inside Illustrator, it’s just not what it’s best at. When you first open Illustrator you’ll be greeted with the home screen. There’s a few presets to choose from, a list of recently opened files, and what’s most important: the new file button. Upon clicking it, a menu will pop up with some settings you can customize for your new file, like size, measurement unit, how many artboards you want and some advanced options like Color Mode. Quick tip: use RGB for anything that’s digital, and CMYK for anything that’ll be printed. After setting everything up and clicking the Create button, you’ll reach the most important part of the program, which is the workspace. Everything you see in the screen right now can be customized and moved around, every tool, menu and panel. There are also different workspace presets for different workflows, which you can access on the top right corner of Illustrator. For now, let’s select the Essential Classics preset, just so we’re both on the same page. I think this preset is very good for starters. The workspace in Illustrator can be separated in different parts, and knowing them will help you understand the software. On the very top, we have the Header. Here, you’ll find all the menus. A lot of things in Illustrator can be done in several different ways, but more often than not, you can find what you’re looking for in the menus. Down below we have the Control Bar. It is one of the most helpful elements of the workspace because it is context based – meaning its contents will change depending on the object or the tool you have selected. For example, notice how new options like font and paragraph appear when we select the Text Tool. Below the Control Bar we have the Document Tabs. Each tab is a different file you have opened. On the left side we have the Toolbar, which contains all the tools in Illustrator. If you hover the mouse over a tool, Illustrator will show the tool name, its shortcut and a small video explaining what the tool does. If a tool has a small arrow on the corner, you can click it and hold to open up similar tools – for example, clicking and holding on the Rectangle Tool opens a menu containing similar tools like the Ellipse Tool and the Polygon Tool. On the right side we have the panels. Illustrator has several different panels and they’re all used to perform different actions, like aligning objects, customizing gradients and combining shapes. They can all be opened through the Window Menu and they are kind of a complement to the Toolbar. Panels can be expanded or collapsed using the arrow symbol on the top right corner. On the bottom of the workspace we have the Status Bar. It’s not something all that important, it shows some info about zoom level, selected artboard and selected tool. And finally, in the center of it all, we have the Artboard. This is where you will add elements like geometric shapes, text and images. The white rectangle is the size you selected when creating the document, and more than one artboard can be created, for a multi-paged file, like a presentation. Phew, that’s a lot of stuff already! Don’t worry, give it some time and you will get used to it. Now, I’ll show you some of the most important tools and panels to really get you started! One of the basis of graphic design are geometrical shapes, and that’s where we’ll start. Let’s press the letter M to select the Rectangle Tool. All the Shape Tools work more or less in the same way, so I’ll just explain the Rectangle. But remember, click and hold on the Rectangle Tool to bring the menu with the other shapes. To create shapes in the artboard you have two options: you can either click and drag and make the shape the size and proportion you want, or just click a single time, which will bring a menu where you can input the exact size you want. When clicking and dragging, you can hold the Shift key to lock the proportion to a perfect square. This also works with the other shapes as well, to create perfect circles or polygons. Now that we have something in the Artboard, we can talk about the tool you will use the most: the Selection Tool. There are actually two selection tools – the Selection Tool, shortcut V, and the Direct Selection Tool, shortcut A. Or, the black cursor and the white cursor. The Selection Tool, black cursor, is used to select, move, rotate and scale entire objects in the artboard. For moving objects, just click and drag them. For rotating, place the cursor close to the corners until it turns into this curved two-sided arrow. For scaling, use these white squares around the bounding box of the object. If you hold shift while scaling, you will also keep the proportions. Bonus tip: hold the Alt or Option key while dragging an object to duplicate it. Now, for the Direct Selection Tool, white cursor, we have to first take a look on how shapes work in Illustrator. Any shape in the Artboard is made up of points that we call Anchors. Two anchors connected make a Path. And when the Path is curved, like in a circle, the Anchor Points will also have Handles to control the curvature. And these three elements – Anchors, Paths and Handles – can only be manipulated individually using the Direct Selection Tool. Let’s draw a circle in the Artboard. Press the letter L to select the Ellipse Tool, then click and drag to draw a circle. Now, press the letter A to select the Direct Selection Tool, and hover the mouse on the top part of the circle, until the Anchor name pops up. Then, click and drag to move only that Anchor Point. Cool, right? You might have noticed that the Handles are also showing now. You can also click and drag them to change the curvature of the Path. You can also click and drag on a Path to move it, but it can be a little finicky. But what if you want to draw something more complex than just geometrical shapes? Well, then you’ll use the Pen Tool. With the Pen Tool, shortcut P, each time you click in the Artboard you create an Anchor Point, which will be connected to the previous one, just like this. If you click and drag, you’ll create a curved path. Clicking back on the first Anchor will close the Path and finish the shape. This tool can be a little bit challenging at first, it requires a little bit of practice to get used to, but it’s a super important part of Illustrator and you’ll definitely use it a lot once you get the hang of it. Now, before we move on to Panels, it’s important that you learn how to move around the Artboard. Which, lucky for you, is super easy to do. You can move around in lots of different ways, but my preferred methods are either to hold the Spacebar then click and drag, or to click and drag using the Mouse Wheel. For zooming, you can hold the Alt key, or Option if you’re on Mac, then scroll with the Mouse Wheel. Now, let’s see a few Panels. The one you’ll definitely use the most is the Color Panel. It’s already opened by default. Oh, and of course, some panels do not display, by default, all their options. Click on the sandwich menu on the top right corner of the panel and click “Show Options”. Now that’s better. The Color Panel is used to change the color of the shapes you create – both the fill color and the outline color, which you can switch by clicking on these two icons right here. Then, all you have to do is select the object and change the color as you like. The next panel is one that I use all the time – the Align Panel. It’s not open by default, so let’s open it in the Window menu. The Align Panel automatically opens the Pathfinder and the Transform Panels as well, they are kind of a group. Let’s drag this panel to the right side and dock it on the Panel Bar. The Align Panel is pretty straightforward. Select the object you want to align and select the desired alignment, like center, left or right. By default, when you select only one object, it will align to the Artboard. But if you have two objects selected, the panel will automatically switch to align to the selection. Next in line is the Pathfinder. This panel is used to create new shapes by combining two or more shapes. You can unite two shapes into one, intersect the parts that are overlapping or just divide everything into different shapes. It’s really easy and really useful. And finally, the Properties Panel. This right here can be your best friend if you get used to it. Just like the Control Bar, the Properties Panel is context based, meaning its contents change depending on what you have selected. In fact, the Properties Panel is kinda like an extension of the Control Bar, in a way. This is the only panel that I have expanded at all times, and it is truly a life saver, it can speed your workflow in so many different ways. I have a full video talking about this panel. If you want to check it out, it is on the card in the top right corner of the screen. Well, congratulations, you just learned the basics of Illustrator, but your journey is just starting. Check this playlist right here to learn more about this wonderful software. Don’t forget to like and subscribe, and if you have any doubts, gimme a shout on the comments and I’ll make sure to answer you. Thank you so much for watching and have a great day. Bye!
Order the best illustration at the best price for your business, your company, or to resell them on other sites that pay for the service at more expensive prices, earning the difference:
Quick and economical illustration – Click Here.

6 comentarios en «Adobe Illustrator for Beginners: Get Started in 10 Minutes»
Deja una respuesta
Entrada siguiente
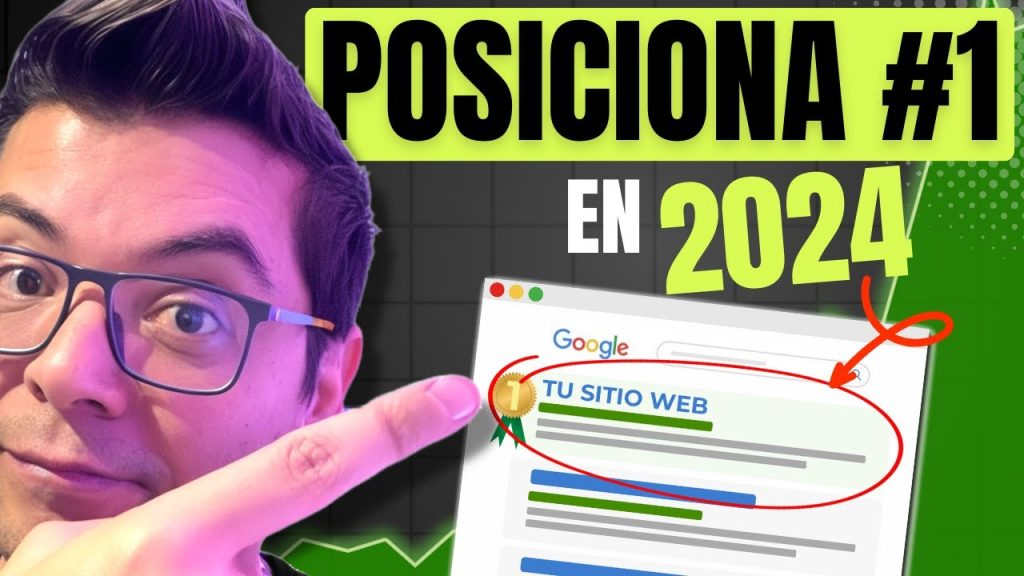
¡Descubre el SECRETO para Posicionar tu Web en Google ...
Sáb Ago 10 , 2024
Amigos, les tengo el secreto revelador sobre cómo posicionar una página web en Google! En este video les cuento cómo subir … Optimiza tu éxito en línea con nuestro servicio de SEO y lleva tu marketing digital al siguiente nivel: ✔️Clic aquí para posicionar en primera página. Si buscas en […]
Um den Willkommensbonus in Anspruch zu nehmen, ist lediglich eine Mindesteinzahlung von 1 Euro erforderlich.
Die maximale Rundeneinsatz von 1 Euro sorgt dafür, dass
Spieler verantwortungsvoll spielen und nicht übermäßig
hohe Einsätze tätigen können. Die OASIS-Sperrdatei und die länderübergreifende Spielersperrdatei (LUGAS)
sind weitere Schutzmechanismen, um gefährdeten Spielern den Zugang zu Online-Glücksspielen zu erschweren. Eine herausragende Besonderheit ist
die „5-Sekunden-Regel“, die sicherstellt, dass zwischen zwei Spielrunden mindestens 5 Sekunden Pause liegen müssen, um Impulsspielen entgegenzuwirken.
Aufgrund der deutschen Rechtslage darf der Anbieter aktuell keine Tisch- oder Live-Dealer Spiele
anbieten und auch die Einzahlungs- und Einsatzsummen sind streng
reguliert. CrazyBuzzer bietet neben zahlreichen Spielautomaten auch eine große Auswahl an Sportwetten, einschließlich Fußball, Basketball und Tennis.
Neben dem attraktiven Willkommensbonus fiel mir das
Fehlen von weiteren Promotionen im Vergleich zu den Bonusangeboten anderer Online Spielhallen negativ auf.
Der Anbieter klärt über Risiken des Glücksspiels auf, führt
Beratungsstellen an und bietet die Option individuelle Tages-, Wochen- oder
Monatslimits einzustellen. Das junge Unternehmen punktet, indem es ausschließlich seriöse und etablierte
Zahlungsdienstleister und Spieleentwickler nutzt sowie großen Wert auf die deutschen GGL-Lizenzen legt.
Gegründet wurde das Unternehmen im Juli 2021 von gemäß der deutschen Lizenzvorgaben und ist
ein Teil der Merkur Group.
Durch die klare Struktur und die schnelle Kontoregistrierung bietet der Anbieter
eine ideale Plattform für flexible Unterhaltung.
Die Registrierung war super einfach, und der Willkommensbonus hat mich
direkt überzeugt. Die Mindesteinzahlungssumme ist moderat, sodass auch Anfänger vorsichtig
mit kleineren Beträgen starten können. Damit Nutzer zügig loslegen können, bietet das Casino
gängige Zahlungsmethoden wie Kreditkarten, Banküberweisung,
Sofortüberweisung und beliebte E-Wallets an.
References:
https://online-spielhallen.de/fresh-casino-login-ihr-weg-ins-spielvergnugen/
We want to ensure that we select the best people who have a
passion for delivering exceptional customer service where lasting memories are created.
Every one of our employees plays a crucial part of the
vibrant Country Club experience. This is your opportunity to tell us why you want the position, what
you will bring to the position and why you think you will be a good team fit at the Country Club.
Your resume should be a reflection of who you are,
so feel free to include your voluntary experience, outside interests and hobbies.
Where possible, explain any gaps in time in your resume and make
sure your contact details are accurate and up to date, especially for referees if you have listed them.
Ensure your resume is tailored to the position you are
applying for and that you can demonstrate you have the skills and experience
to be considered for the role.
There are a number of different Country Club Casino bars and restaurants that patrons will enjoy, ranging from fine dining
through to greasy options. The pokies available at the Country Club Casino in Tasmania are
found on the Watergarden floor with more than 100 machines in service at any one time.
These poker games have been shut down in 2021 though, because of the ongoing
coronavirus crisis, which has caused a fair bit of angst for
the casino. The casino games at the Country Club include Federal Baccarat, American Roulette, Rapid Roulette, Texas Hold’em, Federal Pontoon and
Blackjack. Country Club Casino is located about 10 minutes outside
of Launceston and is surrounded by bushland, making it a unique gambling experience in Tasmania and
Australia.
Adjacent are Country Club Villas, with a range of villa
suites and ideal family accommodation in self-contained
1, 2 and 3 bedroom villas, as well as self-contained apartments in Launceston. The Federal Rewards Club is a joint loyalty program of Wrest Point and Country Club Tasmania and as a member you will
have access to a range of exclusive member only benefits and rewards.
No matter how you choose to celebrate, Country Club is the perfect place to
enjoy the spirit of the season, stress-free and full of festive cheer.
Adjacent to our Bottle Shop which has a quality selection of top local wines.
References:
https://blackcoin.co/mr-o-the-best-crypto-casino/
To submit a change of address request for someone who is deceased, you must go in-person to a Post Office location with documents showing you’re the executor or administrator authorized to manage
their mail. If you’re only relocating for 15 days up to 1 year (like going to school or staying with family
or friends), submit a temporary change of address request.
If you’re moving, submit a permanent change of address request so
your USPS® mail is properly rerouted to your new address.
You don’t need to be a journalist to enjoy the quiz.
And once again, it is designed for casual play. There are many quizzes on the internet.
The quiz is basically current events turned into a game.
References:
https://blackcoin.co/vip-slots-casino-no-deposit-bonus-codes/
online slots uk paypal
References:
http://www.swingputt.com
online casino roulette paypal
References:
https://allsolution.xyz/employer/online-casino-mit-paypal-einzahlung-die-top-casinos-im-vergleich/
paypal casino usa
References:
https://fanajobs.com/profile/trey9506756375